

How to Migrate Business Email from SiteGround to Hostinger

Open Free Email in the Hostinger panel

Move your business email to Hostinger: create the mailbox, import old messages over IMAP, keep your DNS records intact and avoid losing mail during the switch.

Affiliate disclosure: this article contains affiliate links. If you buy through them we may earn a commission, at no extra cost to you. It never changes what we recommend — see our affiliate disclaimer.

Contents
  1. Highlights:
  2. Before You Start
  3. Step 1: Set Up the Mailbox on Hostinger
  4. Step 2: Import Your Old Emails
  5. Step 3: Switch Your DNS
  6. Good to Know
  7. Next Step

If your business email lives on SiteGround, you can move both the mailboxes and the old messages to Hostinger. It’s quick, because Hostinger has a built-in Email Import tool that copies messages from your old provider over IMAP, so you don’t have to drag folders around in a mail client.

This guide is part of a series on moving from SiteGround to Hostinger. I assume you’ve already migrated the website, or are about to. The steps also work for any other host that offers IMAP.

Highlights:

  • Create the same mailbox on Hostinger first, then import the old messages.
  • If your domain uses Hostinger’s nameservers, the email DNS records are added automatically.
  • You only need the IMAP server name, address and password of the old mailbox.
  • Keep the old mailbox running until the import has finished and you’ve checked it.

Before You Start

  1. Buy or open a Hostinger plan that includes email. If you don’t have one yet, see Hostinger hosting plans.
  2. List your mailboxes. Write down every address you use (info@, sales@ and so on) and the password for each. The import is done one mailbox at a time.
  3. Don’t change your MX records yet. Until you’ve created the mailboxes and imported the old mail, keep the old DNS in place so no message is lost.
  4. Know your DNS situation. If your domain’s nameservers will point to Hostinger, the required MX, SPF and DKIM records are created for you. If you keep another DNS provider, you’ll add those records yourself.

Step 1: Set Up the Mailbox on Hostinger

First, create the exact same email account on Hostinger.

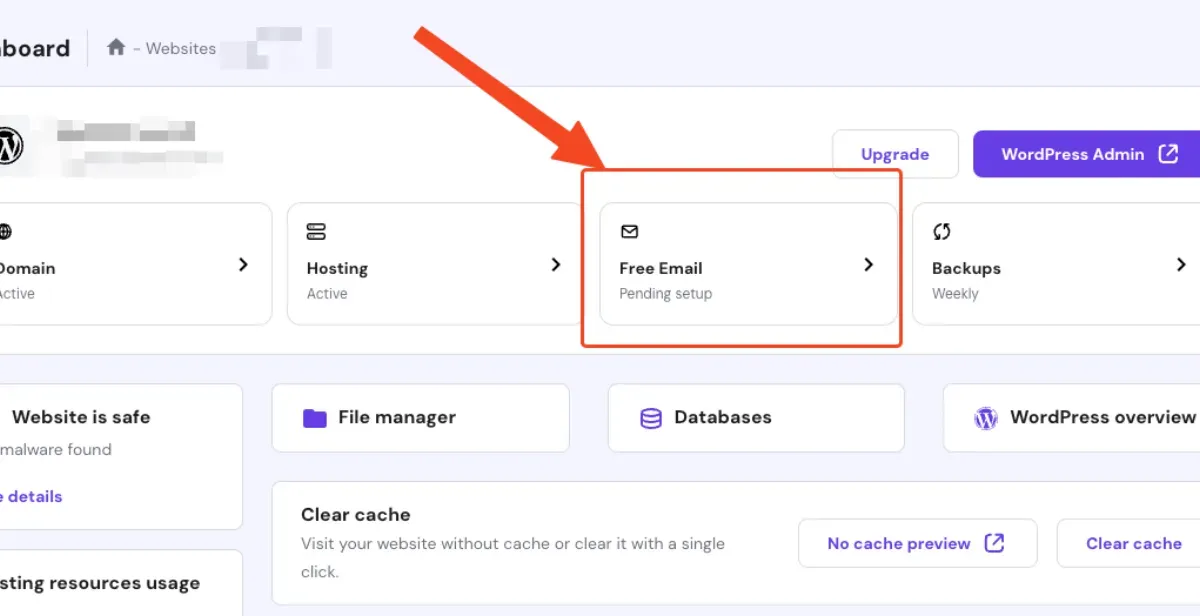
  1. Open the Hostinger admin panel and click Free Email.

    Open Free Email in the Hostinger panel

  2. Choose your plan. Hostinger Free is enough to start, and you can upgrade to a paid plan later.

    Choose the Hostinger free email plan

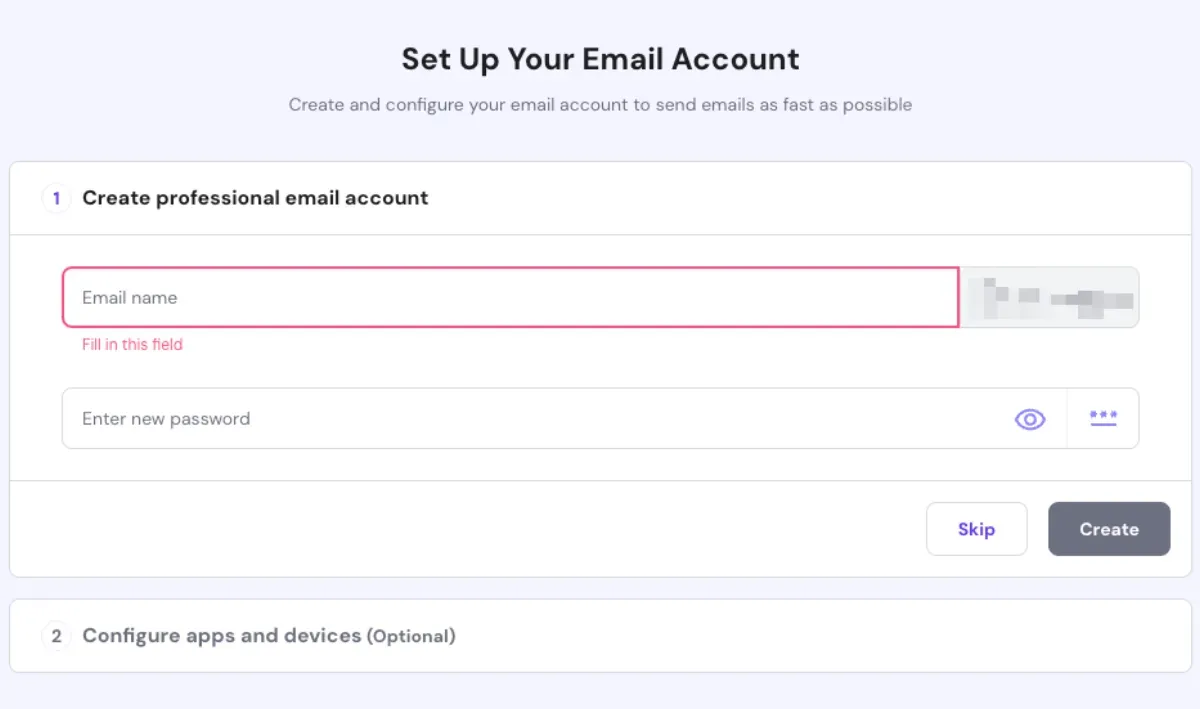
  3. Enter the account name you need (the part before the @), create a password and click Create.

    Create the email account

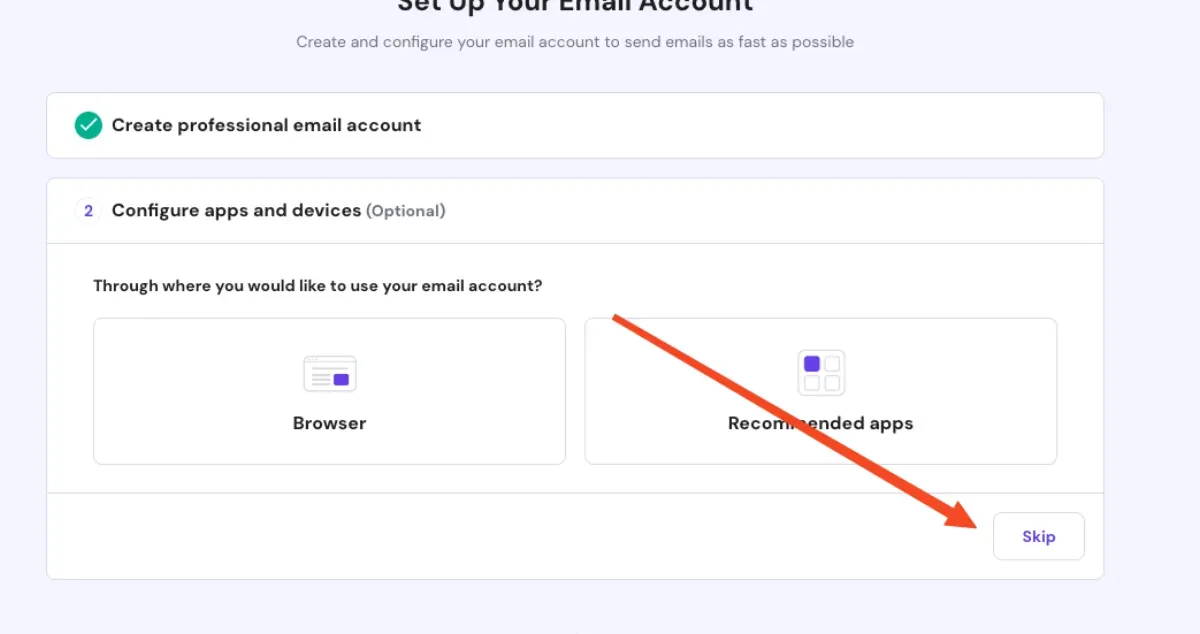
  4. Click Skip to open the main email admin panel.

    Skip the extra setup screen

Your business mailbox now exists on Hostinger. If the domain’s nameservers are Hostinger’s, all the DNS records email needs were added automatically. Repeat these steps for each mailbox you use.

Step 2: Import Your Old Emails

Next, copy the old messages with Hostinger’s built-in tool.

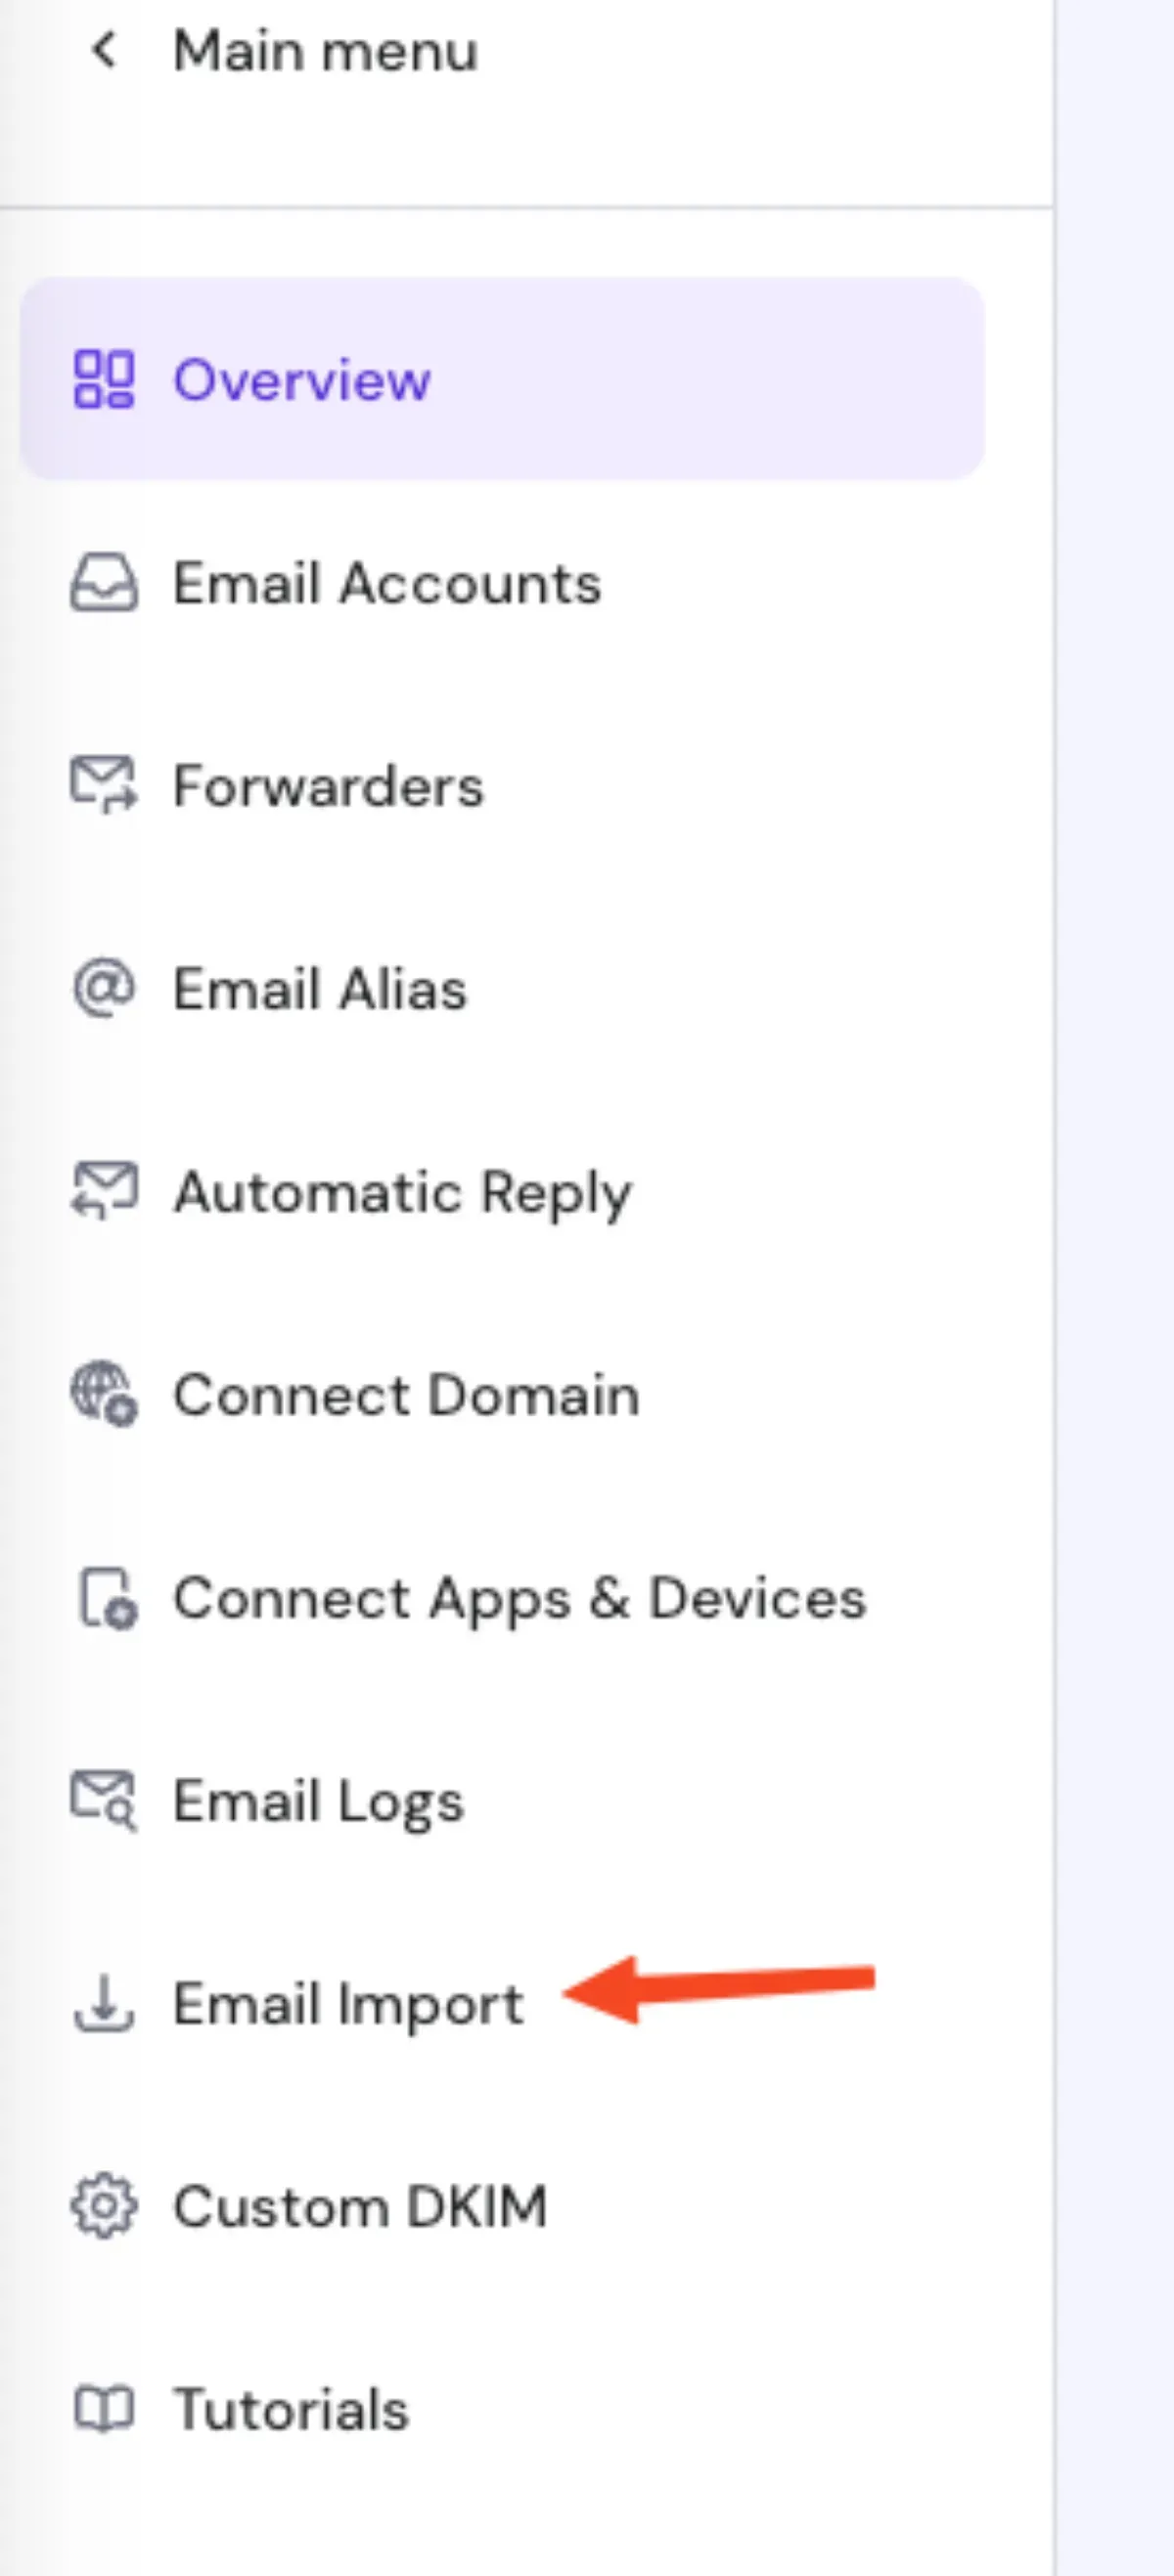
  1. In the email admin panel, find Email Import in the side menu.

    Email Import in the side menu

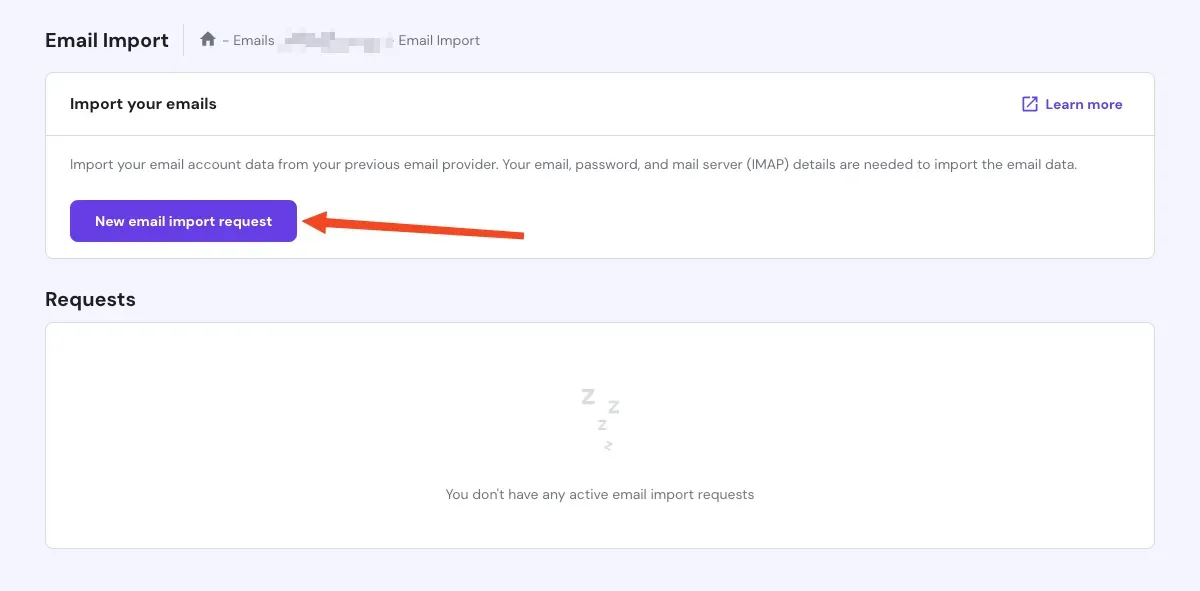
  2. Click New email import request.

    Start a new email import request

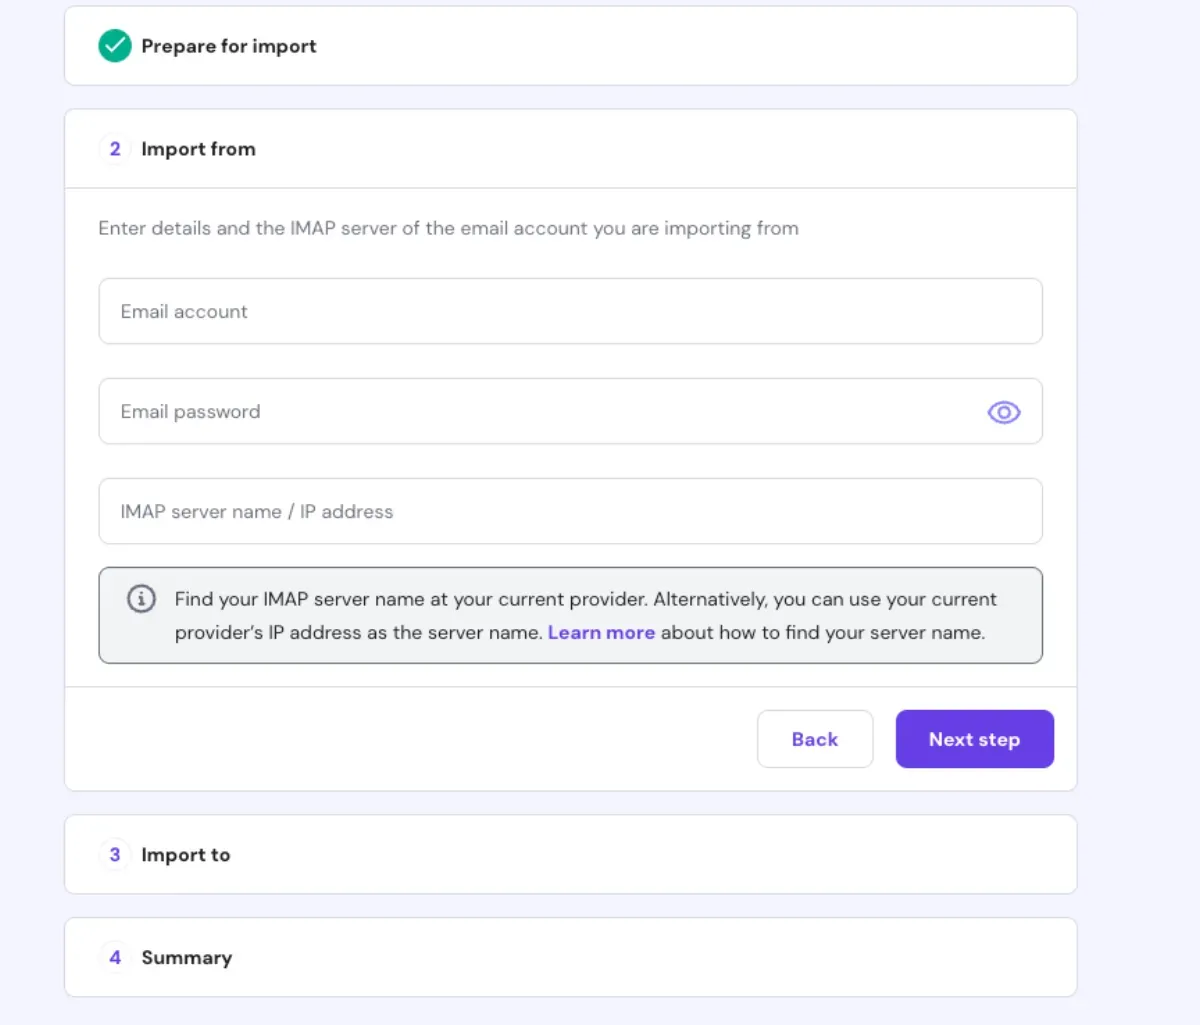
  3. Enter the email address and password of the mailbox you’re importing from. The IMAP server name comes from your current provider.

    Enter the old mailbox details and IMAP server

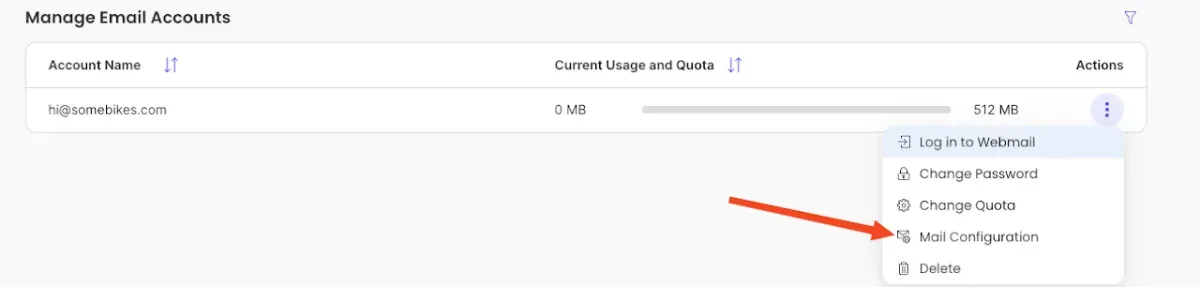
    For SiteGround users, you’ll find the IMAP server in the SiteGround email admin panel: click the three dots on the right of the email account and choose Mail configuration.

    Open Mail configuration in SiteGround

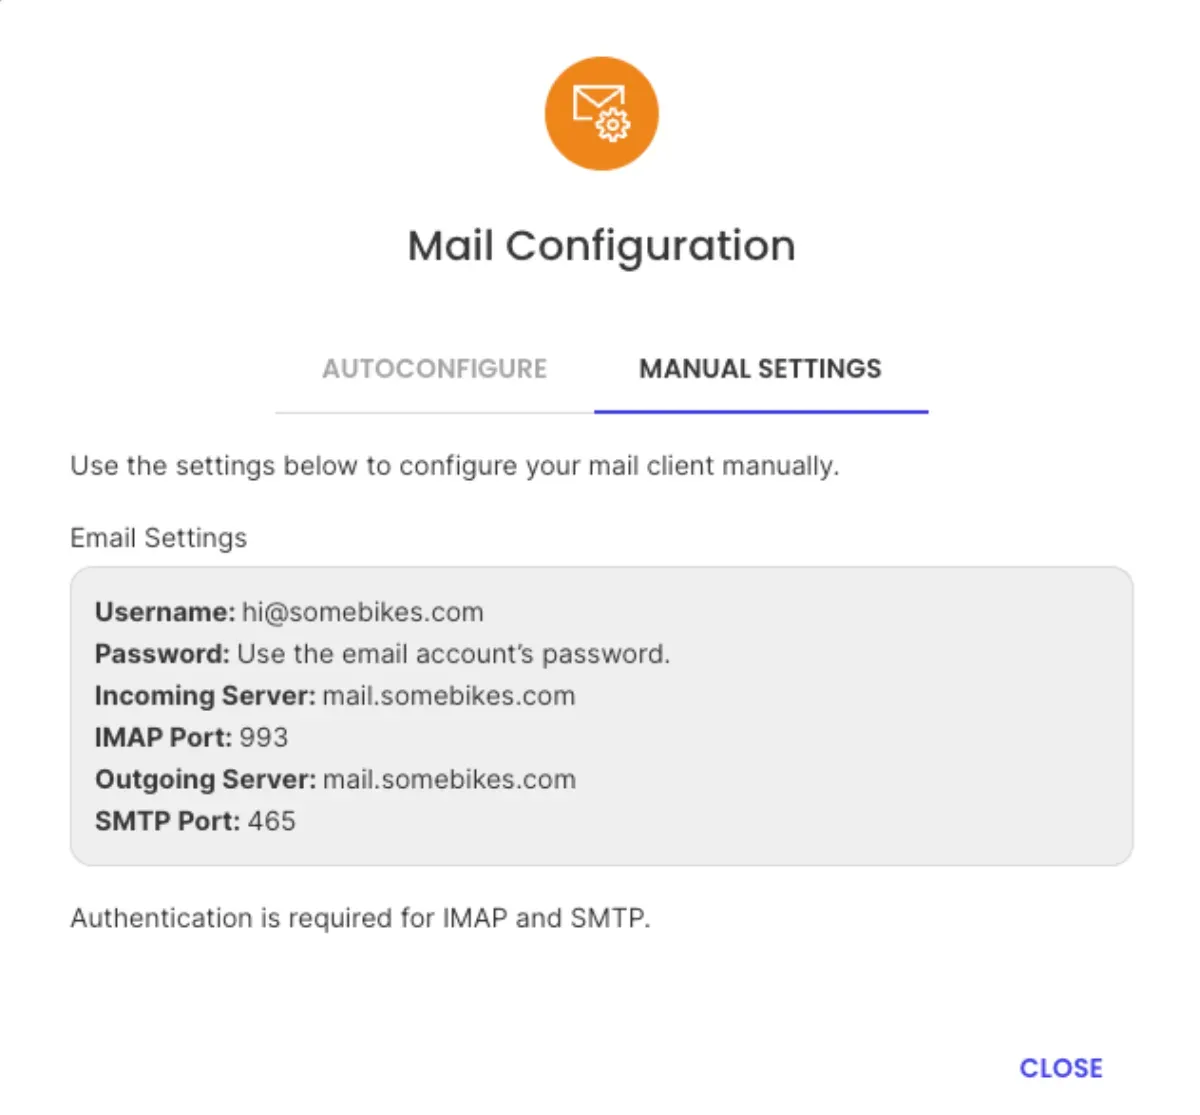
    Click the Manual settings tab and you’ll see your IMAP server name.

    Manual settings show the IMAP server name

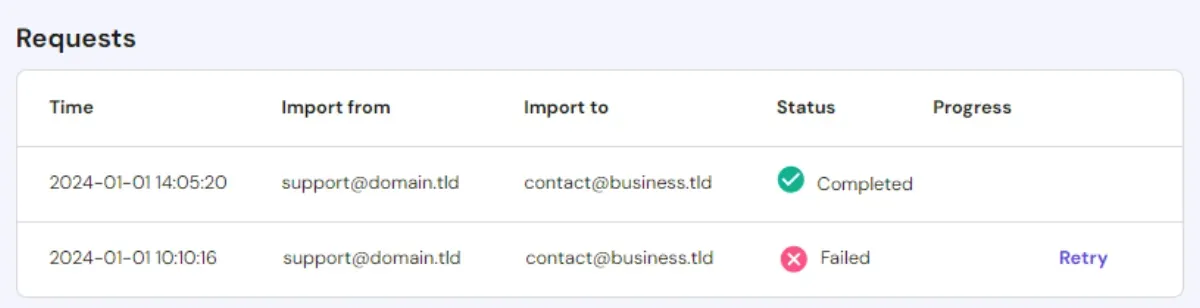
  4. After filling in the IMAP server name, click Next to start the import. A list of import jobs shows the current status.

    Import jobs list with status

Large mailboxes can take a while. You don’t need to keep the page open; check back on the job list.

Step 3: Switch Your DNS

Once the mailboxes exist and the import has finished:

  1. Point your domain to Hostinger (nameservers or the MX records shown in hPanel). See the website migration guide for the nameserver values.
  2. If you keep another DNS provider, add Hostinger’s MX, SPF and DKIM records there, and remove the old host’s MX records.
  3. Send a test message to each address, and reply from it to an outside account, to confirm both directions work.
  4. Run the import once more shortly after the switch if you want to catch messages that arrived on the old mailbox in between.

Good to Know

  • Storage. The free email that comes with Hostinger hosting is small (1 GB per mailbox in my setup). If you have a large mailbox, you may need a paid email plan: at the time of writing, Starter gives 5 GB at $0.39 per mailbox per month on a 48-month term (renewing at $1.59), Standard gives 20 GB, and Premium gives 50 GB.
  • Provider change. Hostinger used to resell Titan email and has since moved to its own email service, so older tutorials may show different screens.
  • No official app. Hostinger email doesn’t have its own mobile app. You can use webmail at mail.hostinger.com or add the account to almost any mail client (Gmail, Outlook, Apple Mail and others).
  • Keep the old mailbox until the import is complete and you’ve checked your folders, then cancel it together with the old hosting.

Before you cancel, it helps to know what the new hosting will cost once the promotional term ends; our web hosting cost calculator shows the real total over the years you plan to stay.

Next Step

With the website and email moved, speed up WordPress on Hostinger to get the most out of the new host. Not decided yet? Read Hostinger vs SiteGround.

See Hostinger hosting plans

Final Thoughts:

Create the mailbox first, import the old messages, then change the DNS. Done in that order, moving business email takes less than an hour of attention and no mail gets lost. Check your storage needs before you pick the free plan, and keep the old mailbox around until you’re sure everything arrived.